
GRADED UNIT 1: Victory
HND Yr 1 Computer Arts & Design: Animation Brief
This is the brief I was given for my fourth and final project for the year: Victory.This unit also serves as my Graded Unit which is assessed for my course marks.
Introduction
This is a live project where you are required to design and produce highly creative animated
projections for a theatre production which will be performed at The Space theatre, Kingsway
Campus, on the 24th, 25th, and 26th April 2013. This project will require you to work closely with your
client to analyse their intentions to inform your interpretation of the brief. You will need to work
proactively and collaboratively throughout to inform your identification of what the project requires,
generate your own ideas and modify them according to feedback, and ensure a highly creative
though prompt delivery of appropriate material and subsequent adjustments.
This challenge has been designed to test your ability to demonstrate the knowledge and skills that
you have gained throughout the first year of your course at Dundee College. You should think
very carefully about how to provide yourself with the best possible chance of achieving a high
grade based on your evaluation of your strengths and abilities. Your performance throughout this
project must clearly demonstrate your enthusiastic, organised, highly creative, and well informed
approach as a self-directed animator.
There are 3 key phases to this project: Planning, Developing, and Evaluation. To pass the
Graded Unit you will have to gain enough marks to pass each phase. You must pass each phase.
In exceptional circumstances time may be given for re-mediation when a phase is not passed (If
given this will be strictly limited to a maximum of 7 days: In such circumstances only one attempt at
re-mediation will be allowed).
• Planning (15 % of overall marks for this unit) : 1 weeks
• Development (70 % of overall marks for this unit): 7 weeks
• Evaluation (15 % of overall marks for this unit): 1 weeks
In the unlikely event that you don't manage to pass a stage on re-mediation you will be required to
restart the Graded Unit from the beginning with a significantly different brief.
This is a Graded Unit and as such lecturers are permitted to give you guidance only. You will be
provided with 3 mentor meetings throughout the project, every one of which you MUST attend. The
times and dates for these are provided within this project brief package. It is your own
responsibility to ensure you keep these times clear and make sure you are punctual. If provided
meeting times are not suitable you must notify your Group Tutor immediately. You may request
help at any point throughout this project though you should understand that if the help sought is
likely to be of a nature beyond general guidance you will be warned this is the case and informed
that if this help is accepted this will be recorded and may count against your results.
This project is graded out of 100 marks and you must pass each stage with only one resubmission
attempt each time. The final grade you will receive will be allocated as follows:
A = 70% — 100%
B = 60% — 69%
C = 50% — 59%
You must pass each stage of the project.
Victory is an epic piece of theatre written by Howard Barker. This adaptation by Jonathan McGrath
(a theatre Director with a history of delivering powerful and edgy theatre with a strong visual
impact) will be developed and performed as a collaboration between Dundee College's HND Acting
Students and HND 3D Animation students (both 1st and 2nd year animators). This version of the
play will be driven by dynamic and energetic projections to create a set that brings the
environments of the story dramatically to life both as an integrated, animated, element of the
performance with which actors’, lighting, and sound interact.
You will be required to engage proactively in collaboration with your Mentor, the Director, and
Acting students to develop a detailed and realistic interpretation of the project's requirements.
Working alongside other animation students you will be responsible for designing and producing
animated and video generated content to create a rich tapestry of animated projections that help
bring this show to life. Jonathan McGrath will be leading the actors and yourselves in exploring the
different possible interpretations of this play and these explorations will be developed into what will
become Jonathan's adaptation of the play. Jonathan is very keen to encourage your own highly
creative input and is very much looking forward to hearing about all your ideas.
He has identified a variety of sources that must influence the direction of the visual style of this work:
• Japanese Shadow Fighter : Kagemu
• Amon Tobin ' ISAM ' Live : Mutek Premier e
• The work of Theatre Director Robert Wilson including ' The Life And Death Of Marina Abramovic '
• ' Undance ', Directed by Wayne McGregor
• ‘ For A Second I Stood ’, a production performed by previous Dundee College
dance students (available to view through Moodle).
3DS Max Render Settings Final Export Settings
T.B.C. T.B.C.
72 dpi Codec: H.264
Tif image sequence Format: Quicktime: .mov
30 fps 30 fps
The 9 week time-scale of this project must be adhered to, you should be realistic about your
ambitions relative to your current skill-set. You will be assessed more on the quality of your
decision making, the quality and professionalism of the completed animation you submit in meeting
the requirements of the brief, and your working methodology than on the complexity of the
technical processes you undertake.
Your challenge is to design and produce video and 3D animated projections,
inspired by the above examples, that will be projected as the set for the 11 environments the play
takes place in. You are also required to design and create artistic, illusionary animations to link on
set action between scenes creating scene transitions inspired by those that can be seen in films
such as Don’t Look Now (1973), Nicolas Roeg, and Punch Drunk Love (2002), PT Anderson.
Mind Map

Project Plan
Project 4
- Victory – Project Plan

Primary Research
I took a trip up north into the Glens of Scotland to try to get some inspiration for the project. I took many pictures of old Forts and churches in Glen Esk specifically.
The following photos copyright David Young 2012


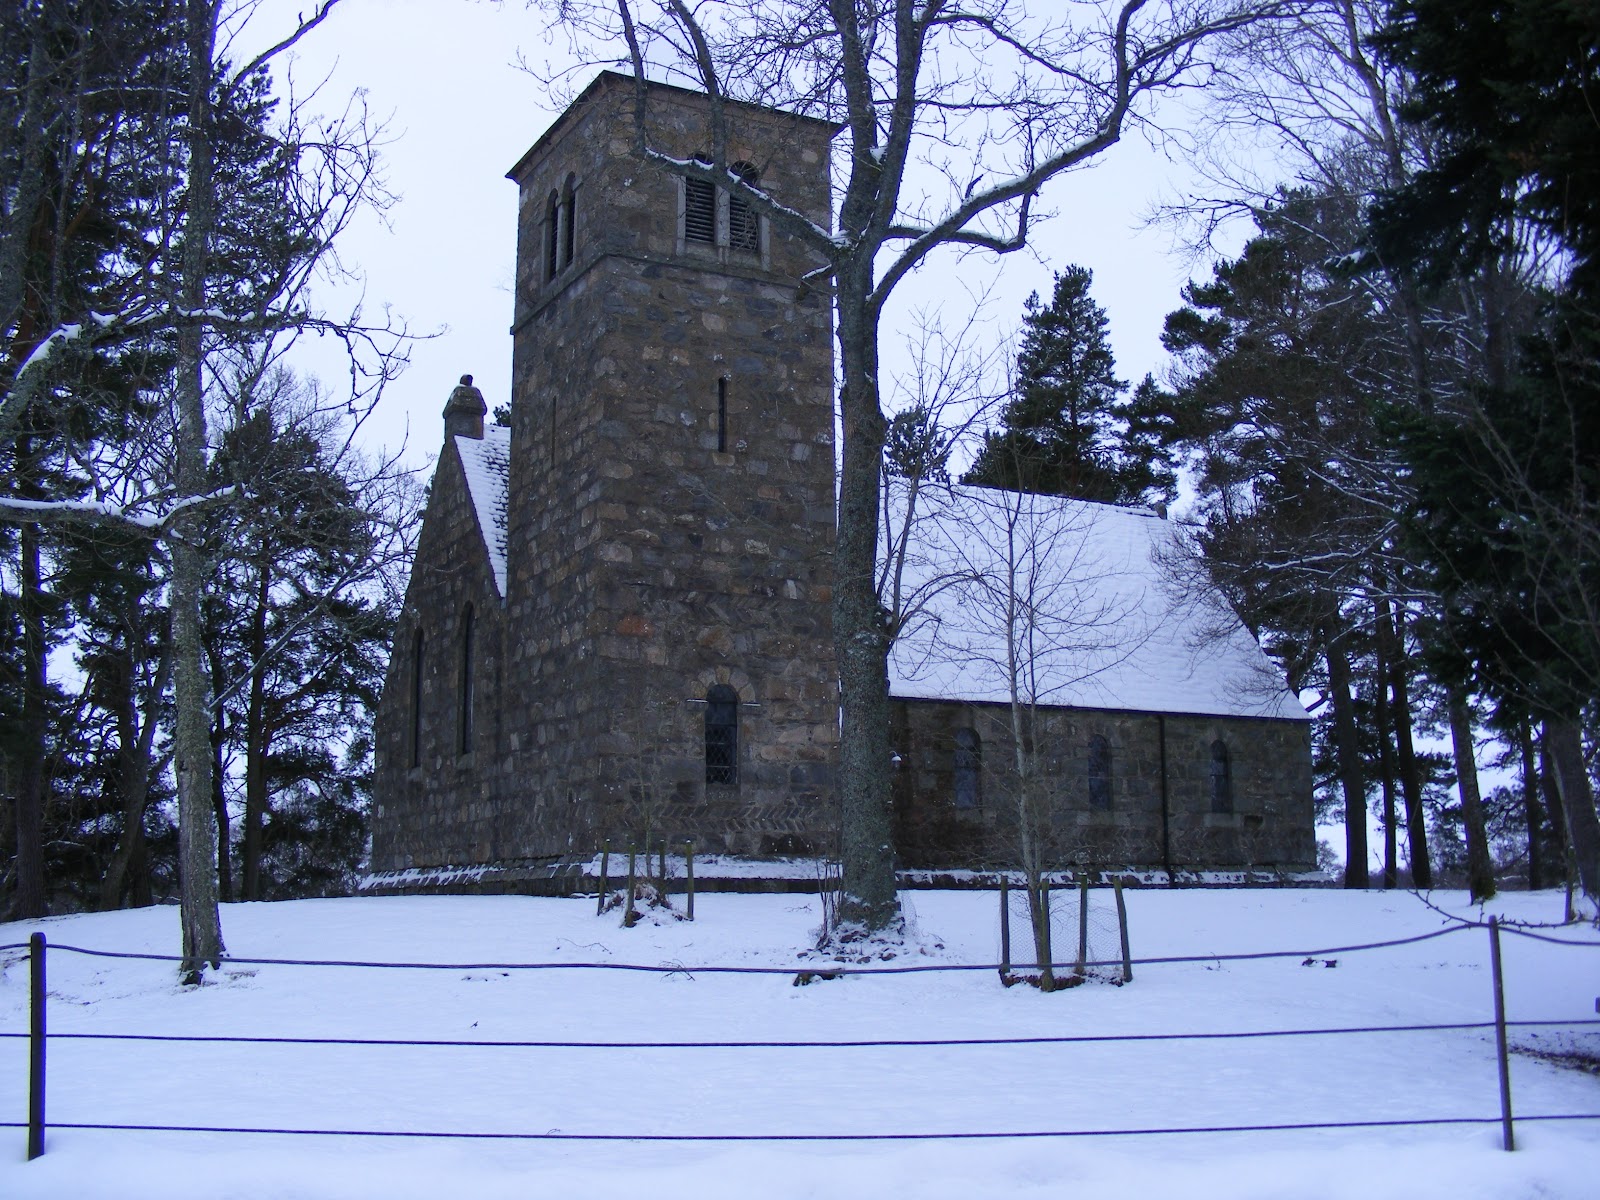


The following is a collection of images I took of the forts walls. This will be used to create tileable texture that I can use later in the project.


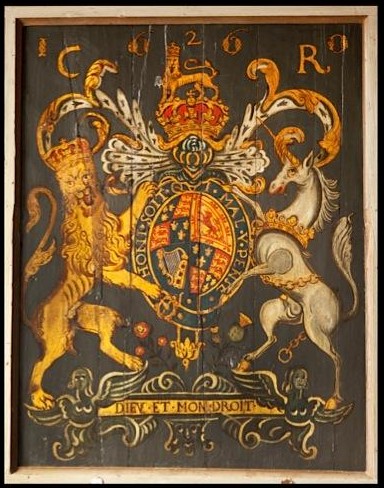
Secondary Research
I have collected these images online as part of my ongoing research into the 17th century, when the production is set.

Charles II Coin
http://c252289.r89.cf3.rackcdn.com/228804.jpg
http://c252289.r89.cf3.rackcdn.com/228804.jpg

Charles II Royal Arms
http://www.thehistoryblog.com/wp-content/uploads/2012/08/St-Marys-Church-Sandwich-1660-Charles-II-e1344916190877.jpg
http://www.thehistoryblog.com/wp-content/uploads/2012/08/St-Marys-Church-Sandwich-1660-Charles-II-e1344916190877.jpg

Charles II - King of England

17th Century House
 17th Century Great Hall

17th Century Dining Room Hall
My roles in the project
My assignments for the Victory project are:-
To help my fellow student Kieran create and animate a 3d Rat model that will be seen throughout various scenes in the production.
To create a 3d scene of a warmly lit room with a fireplace that is cooked upon at it's centre. I must also animate the transition between this scene and the scene that comes before by working in collaboration with my classmates.
I am also part of a team that will produce various pieces of video footage that can be incorporated into the scene.
Chamber Pot/ Cooking Pot Research
It has been discussed within the group that in order to fit in with the grotesqueness of this particular production, the cooking pot in my scene could vaguely resemble a chamber pot. I have collected a few images to represent this idea in my research.


Fireplace Research
This is a collection of images of 17th century fireplaces I collected from the internet to aid in the research of my scene. I have chosen these images because I think they represent a cozy atmosphere. I could use this to create a 3d environment that feels well lived in which I think will benefit the scene I am creating.


Reseach of water for puddles
As part of the video production team, I have tasked myself with coming up with a way to represent puddles for use in a fellow classmates scene.
A short tester video for what could be a method of creating realistic looking puddles with rain dripping into them.
I used a basin filled with water, mixed in some brown sauce to make it look muddy and used a watering can to produce rain.
Scene Concept Art
This image is an early concept drawing of what Scene 04 - Bradshaws house may look like.

The Rat research
Part of the project require a 3d animated Rat to be moving with some of the scenes. These images represent my research into this area.


Concept drawing of a rat
This is a quick concept drawing of what an animated puppet style Rat may look like. I discussed this with my classmate Kieran and we decided to use his Rat concepts as they captured the character much more effectively.

Scene Layout Ideas
I discussed with my classmates who are creating the scenes directly before and after my scene what the scene layout should look like. We did this to try to provide a basis for which to create our transitions between scenes on. We did not want to simply go ahead with creating our scene transitions to find that they are incompatible or do not match up when edited together.
It was discussed between us that we should each focus on a particular part of this scene. As this scene can be broken down into three elements, some of which appear in the scene before and after. My classmate Sarah decided to create the back wall and window designs and Ross volunteered to create the rooms floorboards as he will be animating them in the next scene transition.
I will be focussing on the rest of the room, predominantly the fireplace.

Below is the concept drawing I used for creating my fireplace. I used this image as a template when creating the fireplace in 3d max.


This is a perspective view of the fireplace which I used to gauge the depth.
Scene Transition Idea Thumbnails
Here I thumb-nailed three idea's for the transition between scene 03 and scene 04 (my scene).
1: The carpet in Scene 03 rises up and coats the walls. The red carpet fades to become the firelight on the walls in scene 04.
2: Scene 03 bursts into flames. The flames fill the screen then lessen to become the fire in the fireplace in scene 04.
3: Scene 03 steadily gets darker, the darkness fills the room. A light sparks to life and warms the room from the fireplace in scene 04.
Mentor Meeting
At this stage, I had a mentor meeting with my lecturer Henry Braodhurst. We spoke about how my ideas have been progressing and what I intent to do from here. In regards to the thumnails above, we agreed that my first choice, in which the carpet raises from the floor to encompass the room is the strongest of my ideas. We spoke about how the carpet should wrap itself around the walls though, to become the next room. I took this on board when I created the storyboards for this transition as seen below.
StoryBoards


Storyboards With Colour


I created the above colour storyboards for use in an animatic which I can use to show how the final animation should look.
Animatic
Back Screen
Floor Screen
3D Production
With all of my research out of the way, I now focussed directly on creating the 3D elements in the animation.

First, using my previously drawn fireplace concepts as a guide, I created the basic model of the fireplace that appears in scene 04.

This is the chamber pot inspired cooking pot which rests inside the fireplace.

I created some basic shelves to house the various bowls and candlestick that will fill out the scene.

Using the image shown in the background as a guide, I created this candelabra using the line and lathe tools in 3DS Max.

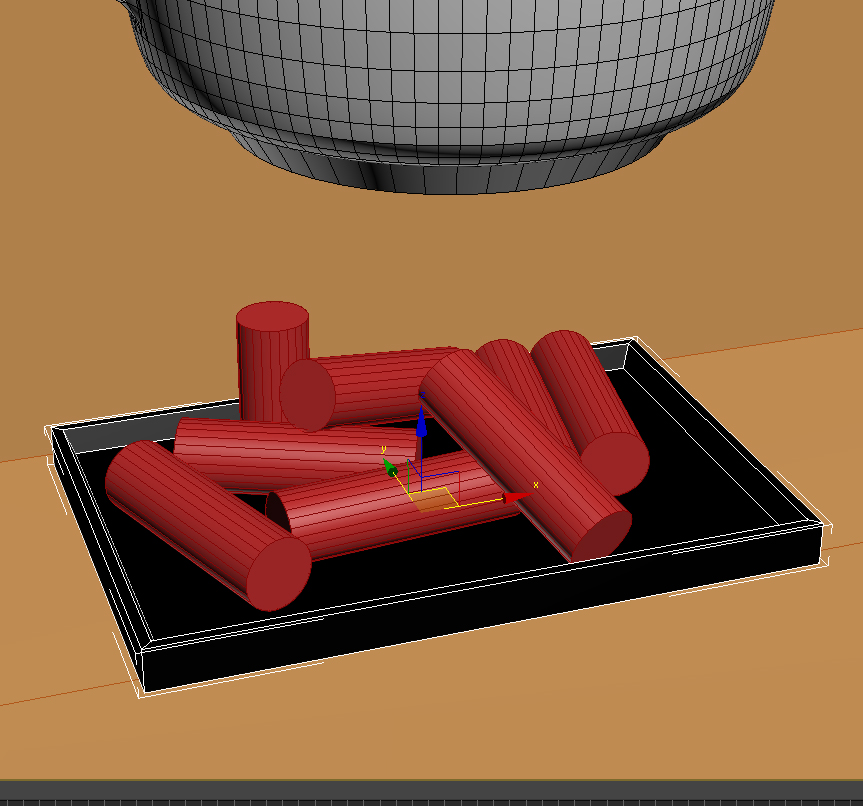
I proceeded to create a fire grate and some basic logs which are placed into the bottom of the fireplace.

I drew a basic outline of a golden bowl. I used one of the fireplace images I collected earlier as a reference. I used this drawing as a reference when I created the bowl, again using the line and lathe modifiers.

I used this same process again to create a simple jar that could be placed on the shelves.


Completed Scene Images
Below is an image of the final scene design after the textures have been applied.
*Please note that the floor and wall were not created by me.

Mentor Meeting
At this stage, I had another mentor meeting with Henry, my lecturer. We spoke about my scene, it is coming along very well. Areas that I should work upon are the creation of the Rat character, more research and then the production needs to start.I could research how to rig a quadruped character online. He also suggested global illumination for the lighting of the scene. This is because my scene is lit almost entirely by firelight so if the ambient light in the room bounces around it will sufficiently light up the scene.
Meeting with Kieran about Ratty 13/03/2013
Today Kieran (who is also working on Ratty) and I discussed our progress with the Rat. Kieran has been really focussed on the creation of the character in regards to character design, modelling and rigging. We discussed how we could bring the character to life in a way that is believable. My role will be to study how real rats move and apply that knowledge to the character's rigging and some animation.
Examples of rats in movement.
Below, I have gathered a selection of images and videos that show rats in movement. This will be very handy research when it comes to not just animating the rat, but will be insightful when it is rigged and weight mapped too.
Created by - significantdavid
Rat's in movement doing tricks
Created by soysauceandgarlic
Rat runs off with candy.
Created by SimpleKaty - Accessed 13/03/2013
I found this example of a 3d animated rat running on youtube.

Rigging and Skinning the Ratty model.
It came to my attention that the rig that Keiran had created for the rat was not working correctly. I decided to scrap the current rig and start from scratch. The bone structure that he created for his model was ok so I kept that in, but I completely gutted out the rigging that he created. I created new controller points and linked them up to the IK chains I made. I made sure that all of the controller points and ik handles were constrained correctly so that they moved in the correct manner.
*Please note, the original Rat character model was not created by me, but I did make some changes to the model to improved the design so it would deform properly.


Now that the rat has been rigged, I moved on to skinning him. I apply a skin modifier so I can weight map the character. A character needs to be skinned and weight mapped so that the model with deform correctly when the bones and controllers are moved.


Ratty Test Renders
Below are the test render I created for the rat. I did this to make sure that the final rat model and rig were working correctly for when it came to keiran animating the rat in the various scenes.
The Transition (Scene 3 to 4)
Next comes the transition between the scene before my scene (scene 03 - Kings chamber) to my scene (scene 04 - Bradshaws house).
I first created the basic layout that is required to be animated within the transition between the scenes.
I added and animated a bend modifier so that the "carpet" would curl upwards towards the roof.
This effect eases off as the carpet fills the back screen of the projection area.
At the same time, the carpet on the floor of the scene recedes backwards away from the viewers to reveal the floorboards that are present in scene 4.
After Sarah had finalised the designs for her scene, I got to work in making sure the animation I had made so far fitted in. I simply had to stretch and scale the carpets I had already created. These would later be textured by Sarah.
*Note: Images below of kings chamber excluding carpet and animation were not created by me.
As you can see, the animation of the carpet rolling up fit in with the scene rather well.
At this stage, when the carpet in the back screen fills the entire frame, I added a morpher modifier. As demonstrated in the image below, this makes it possible to animate the movement of a shape morphing into another shape. I use this method to make it look like the carpet curls around the walls of scene 4.
The images below demonstrate the final animation (*note carpet texture was yet to be added) of the bottom screen carpet. The carpet shown here in grey, recedes to display the floorboards underneath.
*Note: Floorboards were not created by me
Final Scene Renders
Transition between Scene 03 to Scene 04 - Top Screen
Screen grab 001 - Scene 03 Kings Chamber (Created by Sarah Newton)
The transition to scene 04 begins.
You may have noticed in the images above, there is real fire in the fireplace. This was accomplished using a fellow class member Ross' video of a real fireplace. I composited the live action video into place within the fireplace in the scene. This fire is also present in the final renders of scene 4 - bradshaws house.
Transition Bottom Screen
After everything else was completed I added in the lighting for my scenes and rendered out my files. I ran my rendered files through Adobe Premiere Pro for my final output files that I submitted for the production on time.
Final Export Video
The Transition
The following two video's show the transition between scene 3 to scene 4.
Back Screen
Bottom Screen
Scene 04 - Bradshaw's House
This is the looping animation which will be projected as scene 04 in the victory production.
Back Screen
This is the looping animation which will be projected as scene 04 in the victory production.
Back Screen
Bottom Screen
Thank you for reading my blog :)
No comments:
Post a Comment